
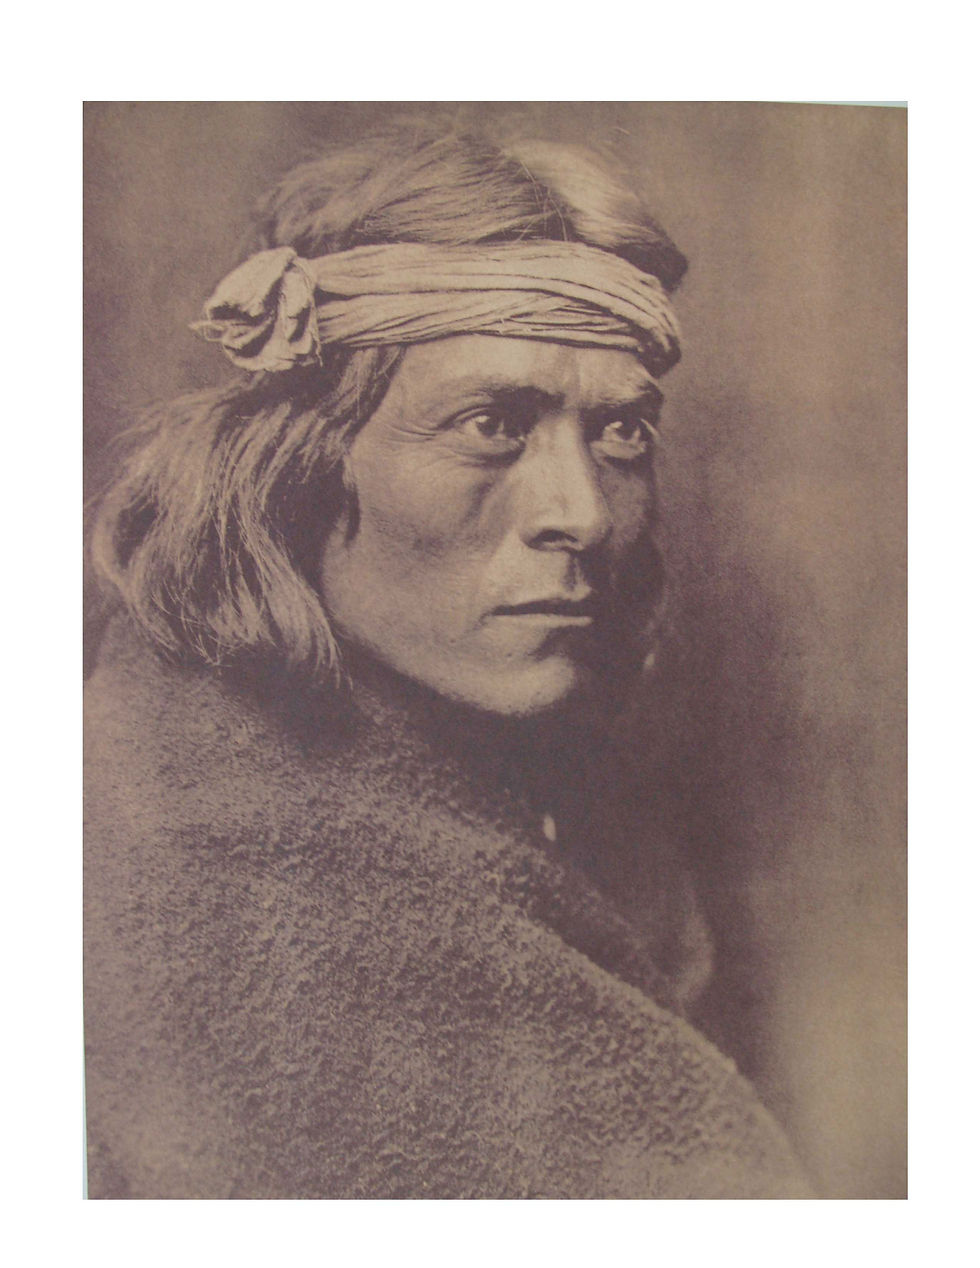
Native American Portrait "Zuni Governor"
- Rick Freitas

- Sep 14, 2020
- 3 min read
Updated: May 20
How I created this oil portrait painting from the photos of Edward S. Curtis

Welcome to my blog post. My name is Rick Freitas I am an artist, caterer, teacher, husband and grew-up on a dairy farm in Los Banos California and was trained by Master Painter Franko Covino in the exquisite art of the Italian Masters Technique.
I want to show you how my painting was created.
Inspiration
I must be inspired! In this case I was given a huge coffee table photography book
"Scenes of Indian Life" by Edward S. Curtis. As I thumbed thru this book I was inspired by the image of "Zuni Governor" It was his presence, his intelligent gaze and sense of self, his Nobility.
The Painting Surface
Most of all my paintings are painted on wood. Painting on wood has both advantages & disadvantages. Since my wood panels are red oak and are not primed and ready to paint I must apply gesso which comes in a bucket and is applied with a roller but I also add marble dust to the gesso, which adds porosity and tooth, this helps the paint hang on to the board. I mix well and apply about 6-10 coats allowing each layer to dry and a light sanding.

The Drawing
Whenever, I describe this next step I just can't keep a straight face (I am not sure why).
I use a burnt twig to render a drawing, this is the road map of the academic Old Masters technique. The idea, the better the drawing the better the painting. If you look at this charcoal drawing you will see corrections on top of corrections, I will spend a week or two on a drawing, focusing on the values and details. Any changes to the reference image are made at this point, in this case I wanted a more up-right figure giving a sense of importance, as well as lengthening the garment and made other subtle changes in shapes occurring in the reference photo.

The Underpainting
"Verdaccio" Is the grey green color, monochromatic colors help to insure correct value relationships throughout the portrait other colors include "Bruno" brown or a simple Grey tonal.
Always correcting the image along the way, even my strongest drawings will reveal correction in the underpainting process.
I only use Verdaccio for portraiture (I will explain why in overpainting chapter). The strong drawing is the value guide to applying the underpainting. In other words, the drawing supports the underpainting process.

The Ovepainting
Color, when I was a beginning painter I followed a strict color value pallet 9 rows of tonal piles of paint, across the top of a keyboard pallet board by 5 additional rows 45 piles of paint representing flesh, 45 piles of paint each with a specific recipe and the master would sign off on my pallet before I laid brush to board, truly old school. Sounds harsh but this technique developed a critical understanding of color. Once again, the values from the previous underpainting support the color process. The underpainting is also used to render half tones & shadows a simple swipe of a finger pulling the color from the place were shadow meets light revealing a perfect halftone.

The Final Process
This is the magic of the "Old Masters" technique, pigments mixed with medium creates a glaze. I mix my medium and varnishes with a specific recipe. In the case of this portrait the painting was a bit smooth and cold. I used glazes to warm and emphasize the texture from the underpainting, my only regret is my photography skills do not show the depth and true color of this piece.
This technique creates paintings that last for centuries but that's another story!
Thank you
Rick Freitas Artist


Wow! This post gave me a completely new perspective on the topic. I appreciate the effort you put into researching and sharing this information—ETH price thank you!